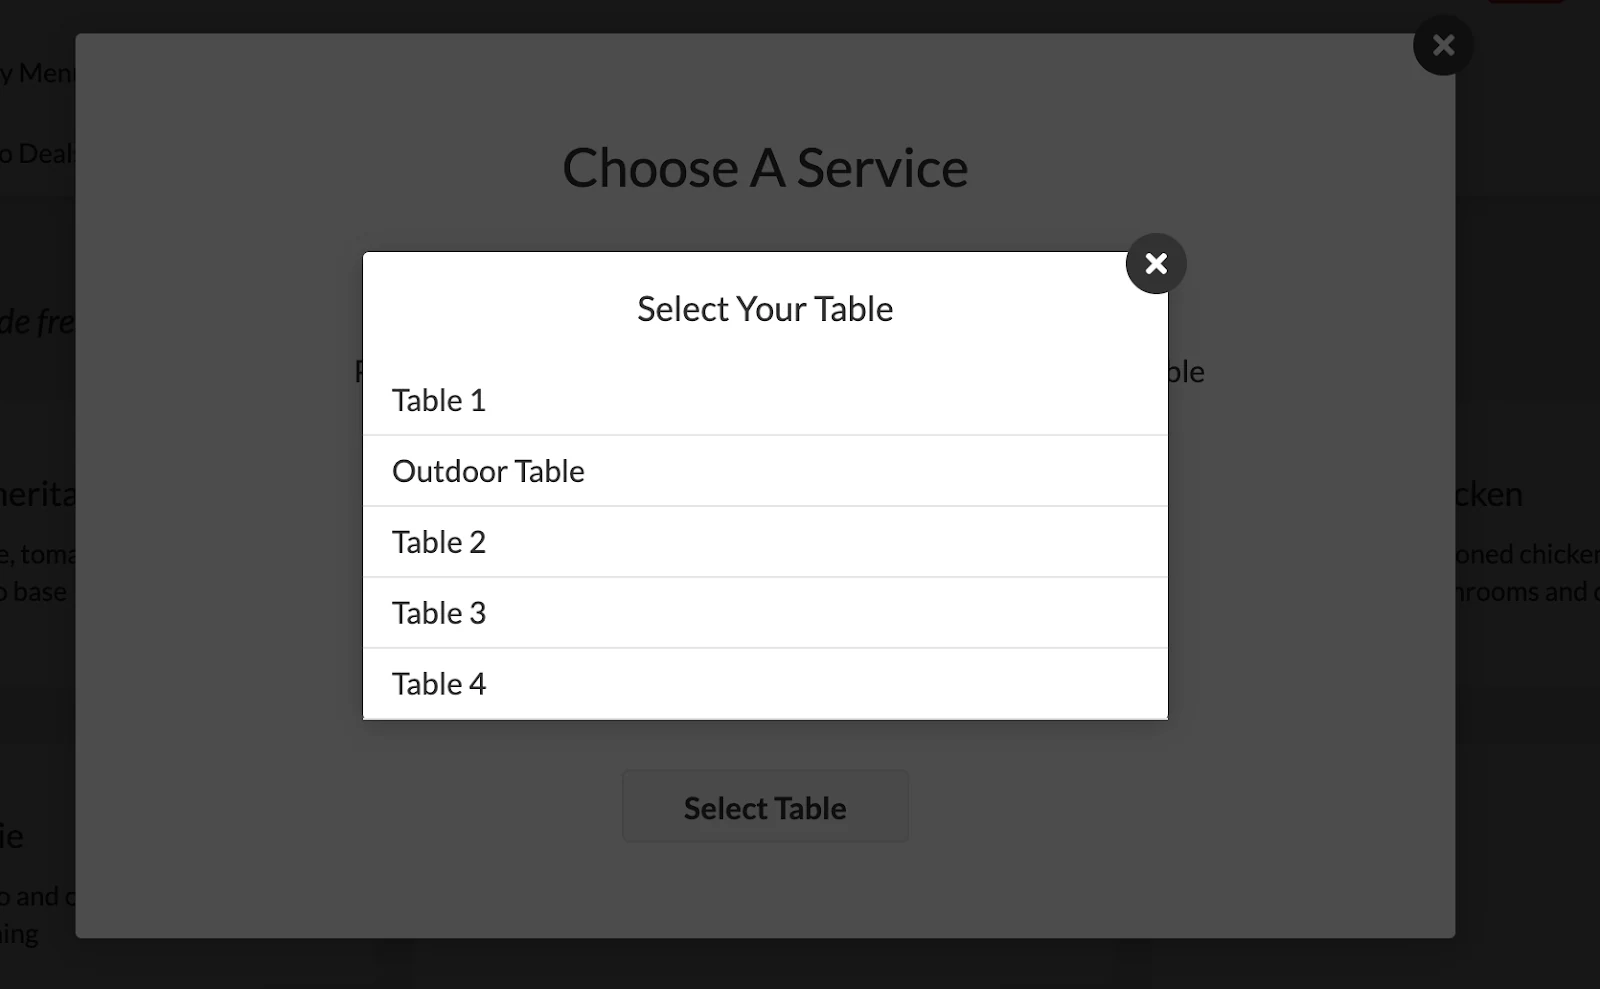
Configure Dine-in (QR/Table Numbers)
Setting up QR table ordering lets customers scan table-specific QR codes to browse the menu, place orders, and pay directly from their phones. This streamlines service, reduces errors, and helps avoid long queues by enabling faster ordering.
Steps:
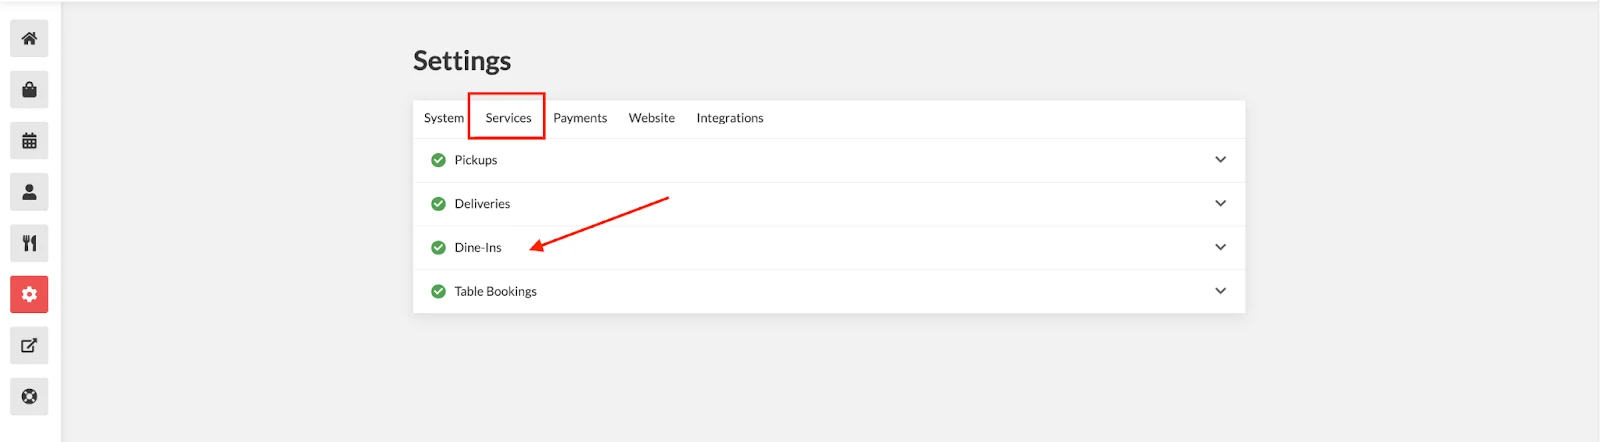
- On the Admin Dashboard, navigate to Settings > Services > Dine-In.
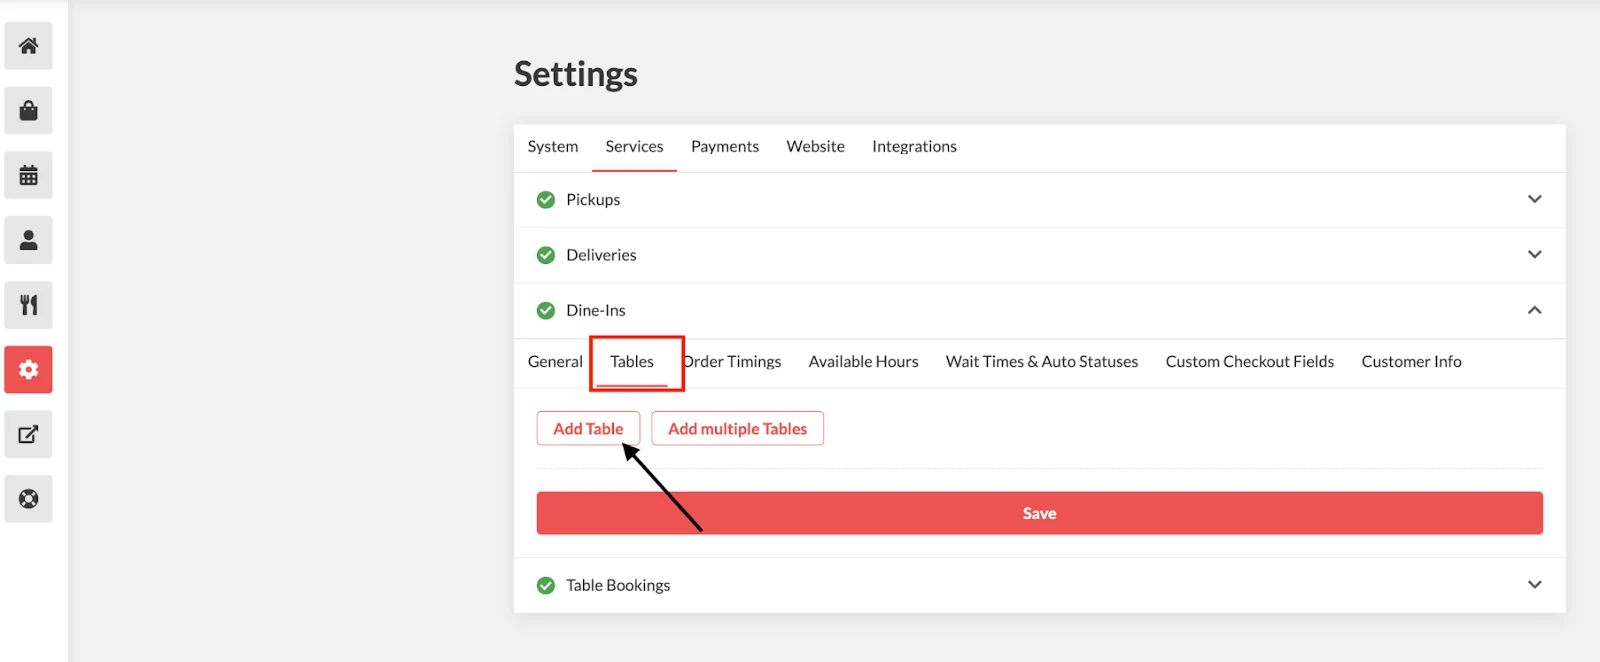
- Select the Tables tab, then choose between Add Table or Add Multiple Tables:
- Add Table: Allows you to add one table at a time.
- Add Multiple Tables: Allows you to add several tables at once, which is especially helpful if your restaurant has many tables.
- Enter a name for the table based on your preference
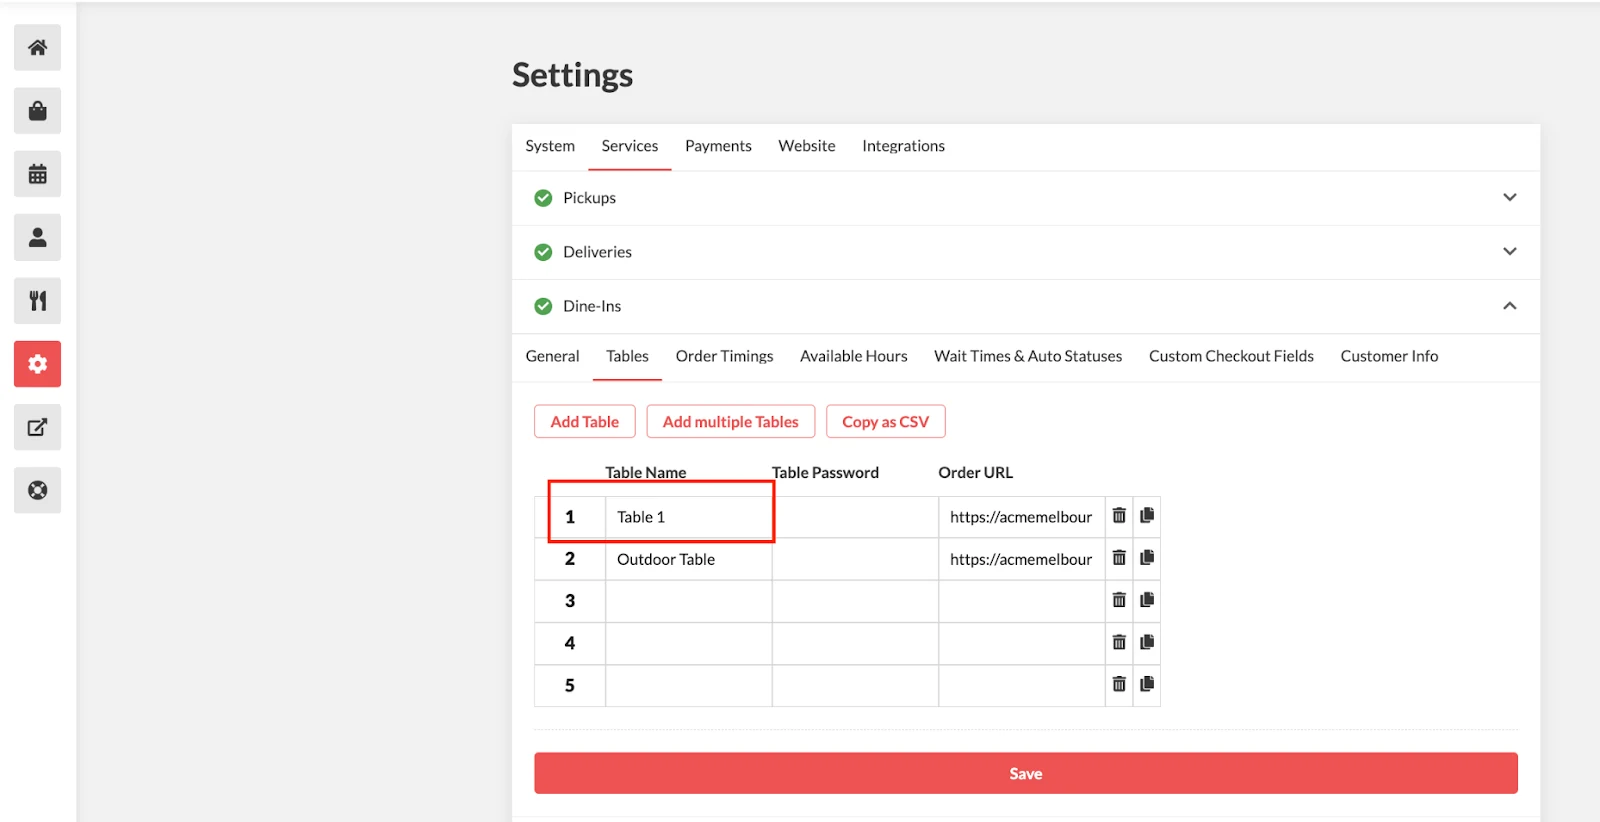
- You can also add Table Password, which adds a layer of security and control to dine-in ordering. It ensures that only customers at a specific table can access and place orders for that table.
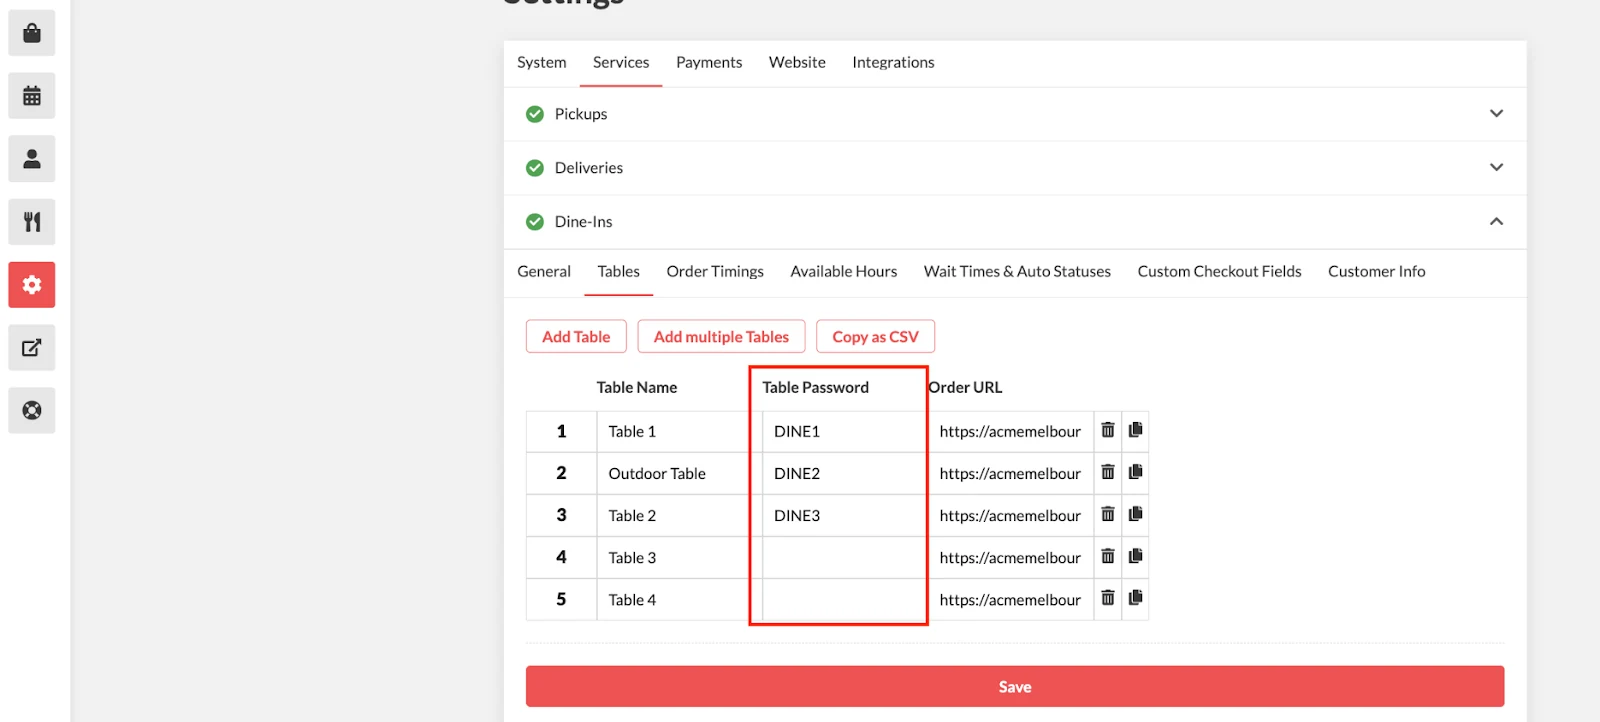
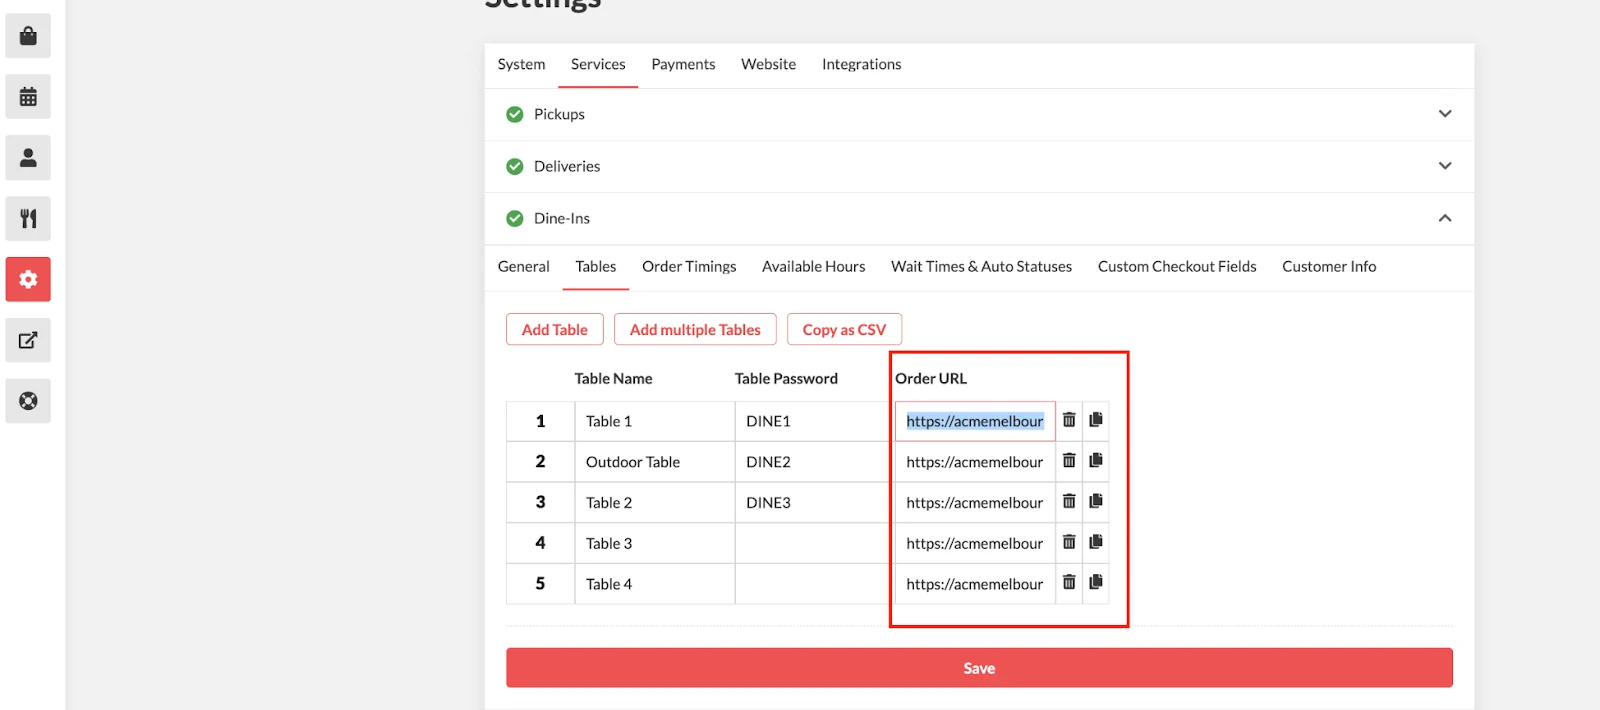
- Once all the tables are added and saved, you can copy the Order URL for each table and paste it into a QR code generator to create QR codes that customers can scan to place orders directly from their table.
- Check your store to ensure all added tables are displayed correctly.